In this guide, I’ll show you how to replicate my custom Android home screen layout, “One Goal”, using just
ADW Launcher EX,
Minimalistic Text, and a custom background.

One Goal - The final result
Getting Set Up
First of all, here are a few things that I won’t be addressing:
- Installing apps
- Taking screenshots
- Installing fonts
- Using Photoshop
What you’ll need, to make this layout from scratch:
Fonts:
Other files:
Once you’ve got all that, you’re ready to continue…
Setting Up ADW Launcher EX
Let’s start!
Note: my interface is set to Portuguese, but I’ll guide you through it.
Get ADW Launcher EX up and running, with two home screens.
First, set up the grid size: 9 columns by 10 rows. (
UI Settings > Screen preferences > Desktop Columns and
UI Settings > Screen Preferences > Desktop Rows.)
Next, hide the status bar and desktop dots, and allow overlapping widgets. (These options are all in
UI Settings > Screen preferences: check “Hide StatusBar”, uncheck “Show desktop indicator”, and check “Overlap widgets”.
Also, hide the icon text. (
UI Settings > Screen preferences > Advanced settings: check “Hide icon labels”).
Now remove the dock background, by selecting “None” as the value of “Main dock”:

The ADW Themes Preferences menu
Next alter your
General Behavior > Animation and Effects
settings according to your preferences. I’ve turned off “infinite
scroll”, and have turned on “wallpaper scroll” – you’ll need this, if
you want to use MP Live Wallpaper and ADW’s Sense previews.
Finally, set “dock size” to 1, in
UI Settings > Main Dock.
Setting Up Your Home Screens
Set up
MP Live Wallpaper using this wallpaper for both screens. (You can download it from
here; it’s 540x960px, but you can easily adapt it to fit your phone’s resolution). This will be the base for our layout.

Basic Wallpaper - click for full size
Add to the screen an ADW Launcher Action shortcut (long-press the
screen, then select Launcher Actions). Choose “Open/close App Drawer”:

Launcher Actions
Long press the icon you just added and select Edit:

Edit the new icon
Tap the icon, then choose the “blank.png” file from
the zip that you downloaded earlier. It will look like this:

No picture for the icon, because it's fully transparent.
Drag this icon – beware, as it will be transparent – to the dock, and tap it to make sure it opens the app drawer.
We are now ready to add Minimalistic Text widgets to the screens.
Adding Widgets
We’ll use a few different sizes of Minimalistic Text widgets:
- Clock: 2×2
- Location: 3×1
- News, Music, Gallery, Nav, Other: 1×1
- All the rest: 2×1
I’m only going to show you the setup for the first MText widget, the clock – you can use the
MTPrefs for everything else.
Always,
always give your widget a name, for future editing and sharing:

Remember to name your widgets
Set MText to hide your widget background:

Uncheck 'Show background'
Under
Text Style, tap “Normal”, then select “font family”,
and choose the right typeface to use: “Tall, Dark and Handsome”, with a
size of 168dip, in white, with no blur or other effects.

You'll need to install the 'Tall, Dark, and Handsome' font
Now we’ll create the layout for our clock. Tap “Predefined layout”
and select “Custom…”, then tap “Custom layout” to open this menu:

Custom layout
Copy the options as above. In English, the top line is “Static text”
(just blank); the second line is “Hour (24h)”, “Static text” (just “:”),
then “Minute (2 digits)”.
Remember to save your widget’s setting, by tapping Save at the bottom of the main menu.
Continue to create the rest of the widgets for Screen 1. Alternatively, unzip the
MTPrefs zip file and copy all
mtprefs files to this folder:
/sdcard/MinimalisticTextPreferences They will look like this on your sdcard:
/sdcard/MinimalisticTextPreferences/OG_clock
Now position the widgets, until your screen looks like this:

Screen 1, with widgets
Next, set up Screen 2:

Screen 2, with widgets. 'Porto' is my location.
Opening an App With a Widget
That red “N” in the above screenshot is a 1×1 Minimalistic Text
widget with static text and color set to transparent. It shows the “N”
because it will be a widget to open a designated app.
Here’s how: in the settings for that widget, under
Tap behavior, select “Start another activity”.
Then, tap “Select an activity or a shortcut”, and then select an app from your list of apps – in my case, I’ll make it open
Pulse News.
Remember: always save your widget configurations, for later revisions.
Now let’s get over to the computer.
Putting It All Together
In Photoshop (or any image editing program), draw the graphics to fit
around the widgets. You will find this much easier if you use a
screenshot of your screens (with the widgets) as a guide.
Here’s what mine look like:
Screen 1:

Click to see full-size
Screen 2:

Click to see full-size
Upload the finished wallpapers to your phone, and change the MP Live
Wallpaper settings to use these wallpapers instead of the basic
templates we had before.
That’s it – you will now have your own amazing “One Goal” home screens!
The final result
Thanks for reading, and I hope you enjoy One Goal!


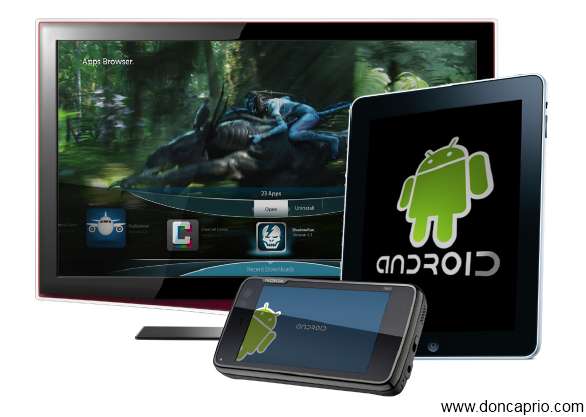 As
seen on their product page, Alien Dalvik even allows you to run Android
apps on TV. There’s no guide anywhere on the internet to download this
and it’s solely available on the manufaturer’s website. You can visit
the product guide page for further information.
As
seen on their product page, Alien Dalvik even allows you to run Android
apps on TV. There’s no guide anywhere on the internet to download this
and it’s solely available on the manufaturer’s website. You can visit
the product guide page for further information.